
 Vitalii Holben
How to Monitor a Specific Section of a Website (Without the False Alert Noise)
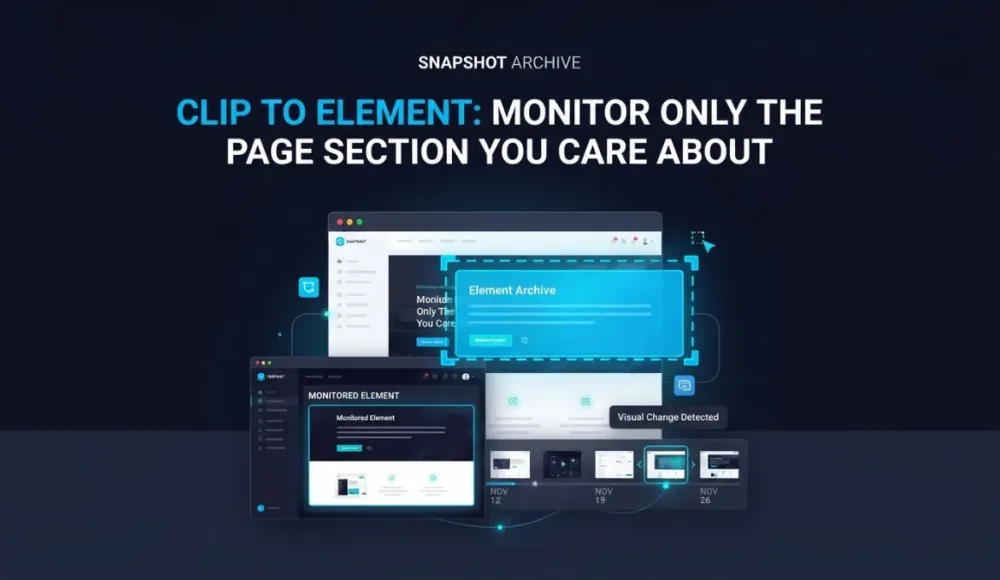
Full-page screenshot monitoring is a trap. You set it up to catch one thing — a price change, a competitor update, a terms revision — and within a day you're getting alerts about rotating ads, cookie consent banners, and recommendation blocks that shuffle with every page load. The signal disappears into the clutter. At some point you start ignoring the alerts. That defeats the entire point. The faster fix is to monitor a specific section of a webpage instead of the full page.
The fix isn't a better alert threshold. It's changing what you capture. Instead of screenshotting the whole page, you crop the capture to the specific section you care about. One CSS selector, and suddenly the only thing in your screenshot is the price field, the stock badge, or the legal clause you're tracking. Everything generating junk alerts doesn't make it into the image at all.
Why Full-Page Screenshots Create Monitoring Noise
Complex pages — e-commerce listings, SaaS pricing pages, news articles — are built with dozens of independent blocks. Ad slots rotate every few seconds. Recommendation carousels change with every visit. Delivery banners appear and disappear based on location and session. Live-chat widgets shift position. Countdown timers tick forward with each reload.
All of that lands in your full-page screenshot. When the next capture runs, visual change detection compares every pixel on the page. If an ad rotated, that's a change. If a recommendation block reshuffled, that's a change. On an active e-commerce listing, you can end up with 20–30% visual diff where nothing you actually care about moved.
We documented this in our Amazon price tracking experiment: even with several hide selectors active, layout noise kept triggering false alerts. The problem wasn't our setup — it was monitoring the whole page when we only needed one section of it. The broader false-positive problem and its causes are covered in our guide to false positives in screenshot monitoring.
How to Monitor a Specific Section of a Webpage
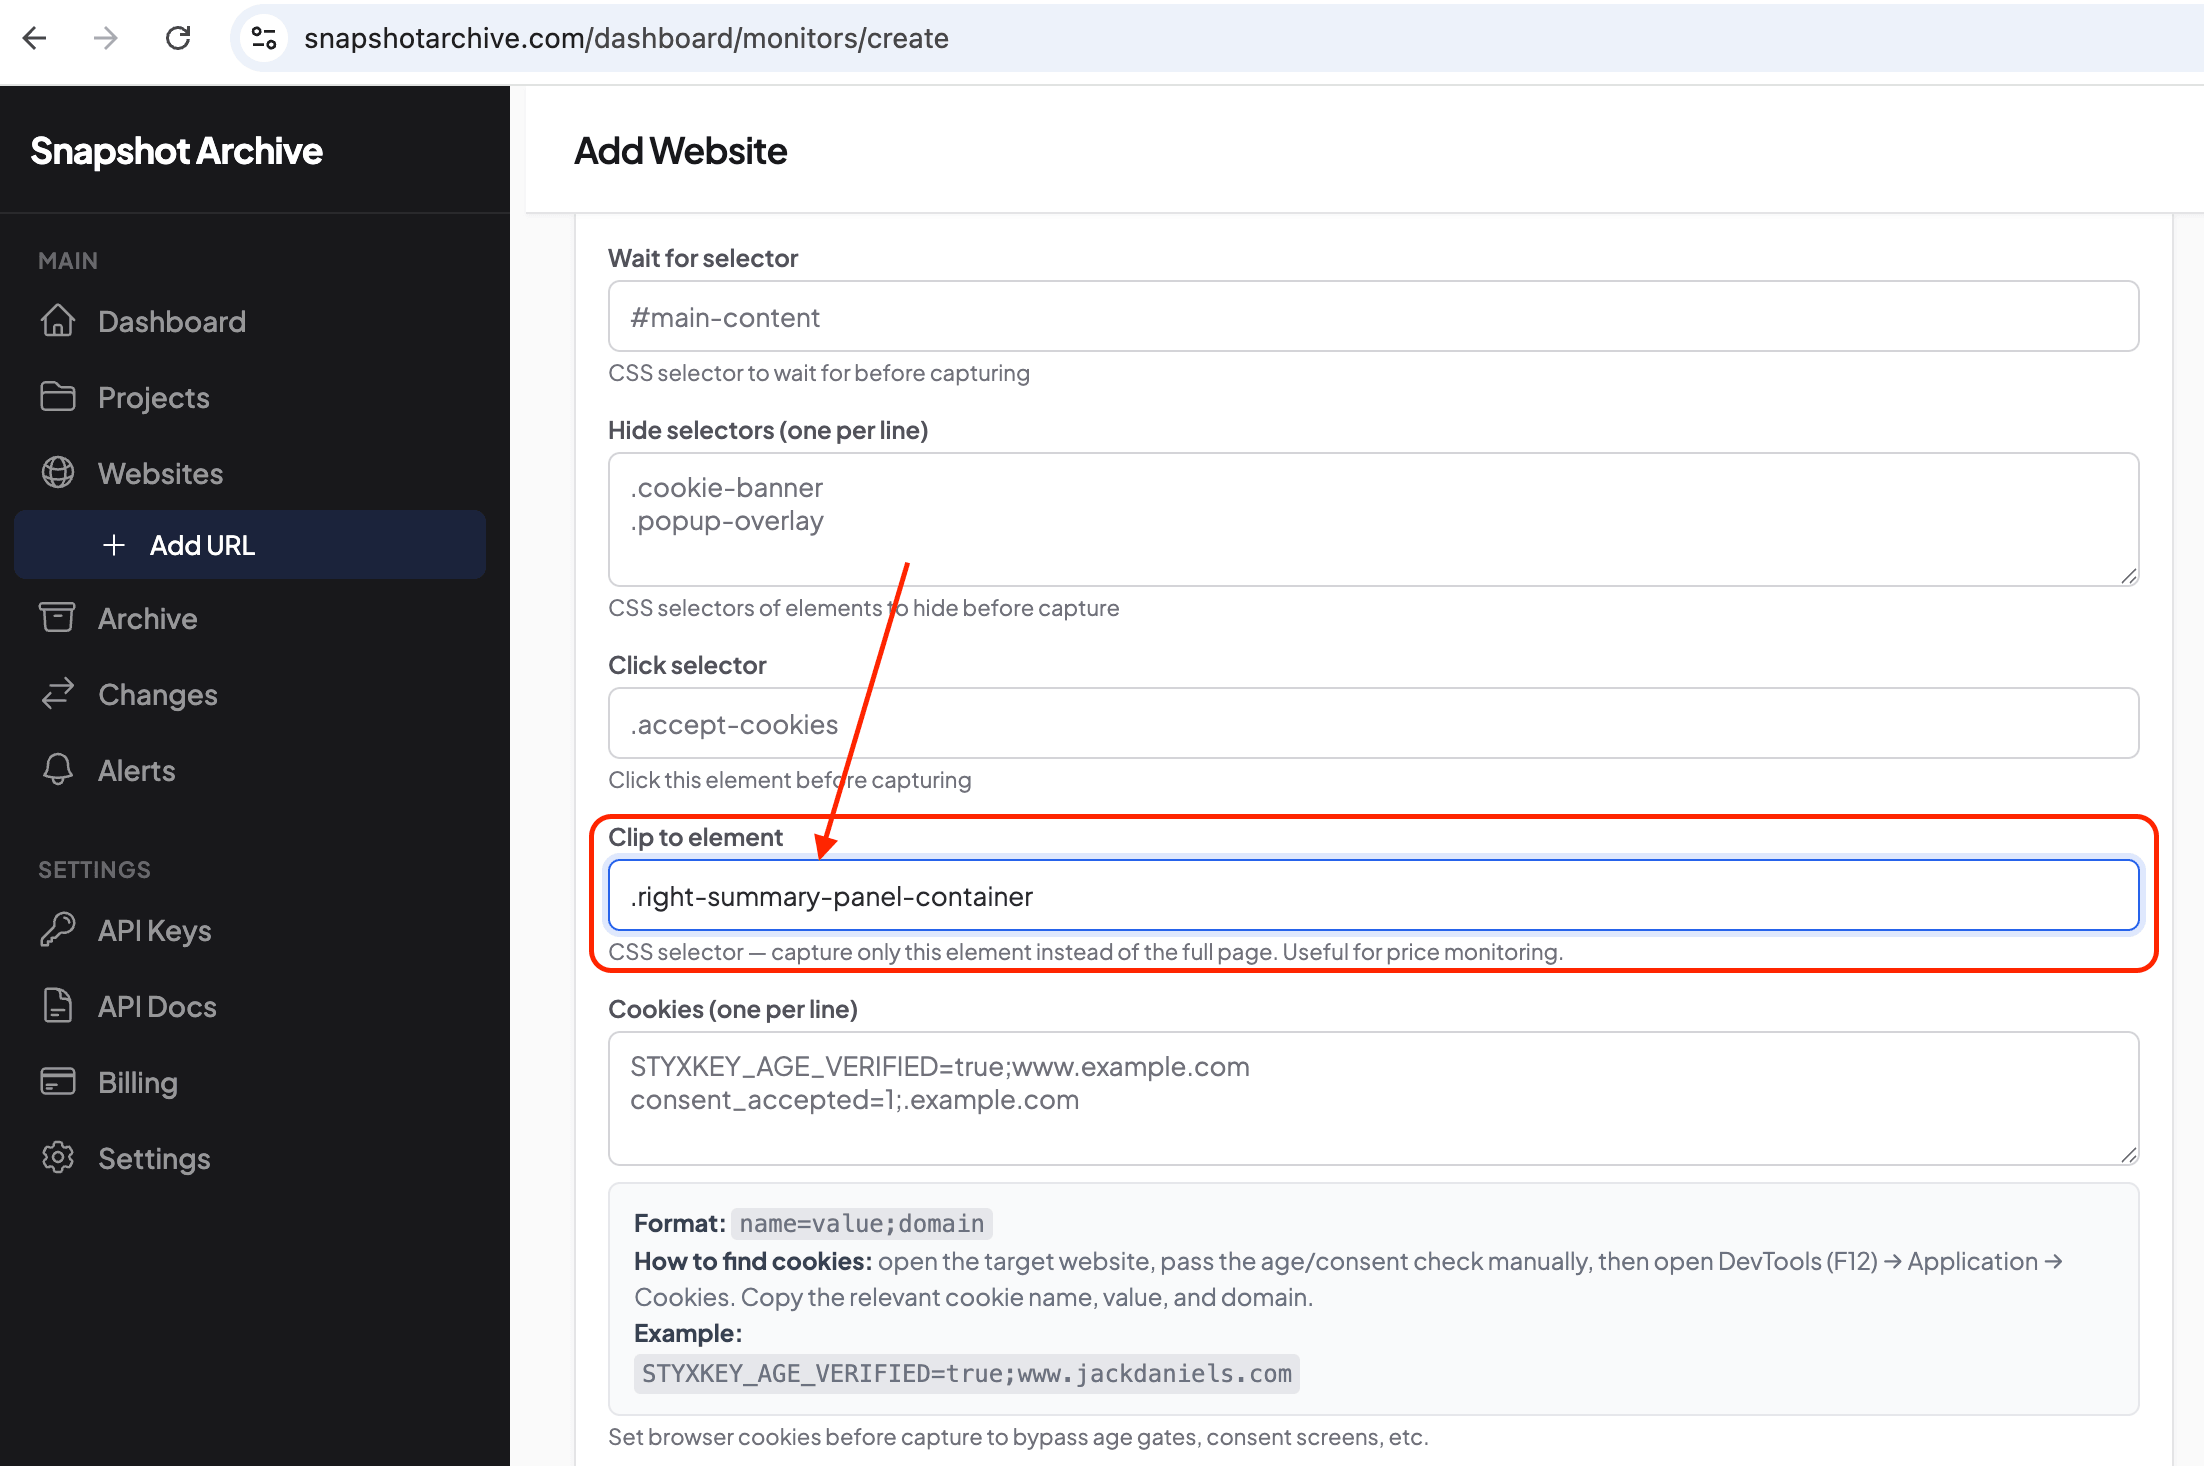
Snapshot Archive has a setting called "Clip to element." When creating or editing a monitor, you specify a CSS selector, and the screenshot crops exactly to the boundaries of that element. The header, footer, sidebars, ad blocks, and everything outside the selected element don't appear in the screenshot.
The result: change detection runs only on that one element. If the price on an eBay listing drops, you get an alert. If the recommendation block next to it reshuffles, you don't. The comparison is precise because the capture zone is precise.
Finding the Right CSS Selector: A Real eBay Example
You don't need to know CSS to do this. Browser developer tools find the selector for you in a few clicks.
Seriously — say you want to track the right-hand price panel on an eBay product page: the block that shows the current price, item condition, quantity, and the Buy It Now button. Open Chrome DevTools (F12), hover over that panel in the inspector, and look at the CSS class. On eBay product pages it's .right-summary-panel-container.
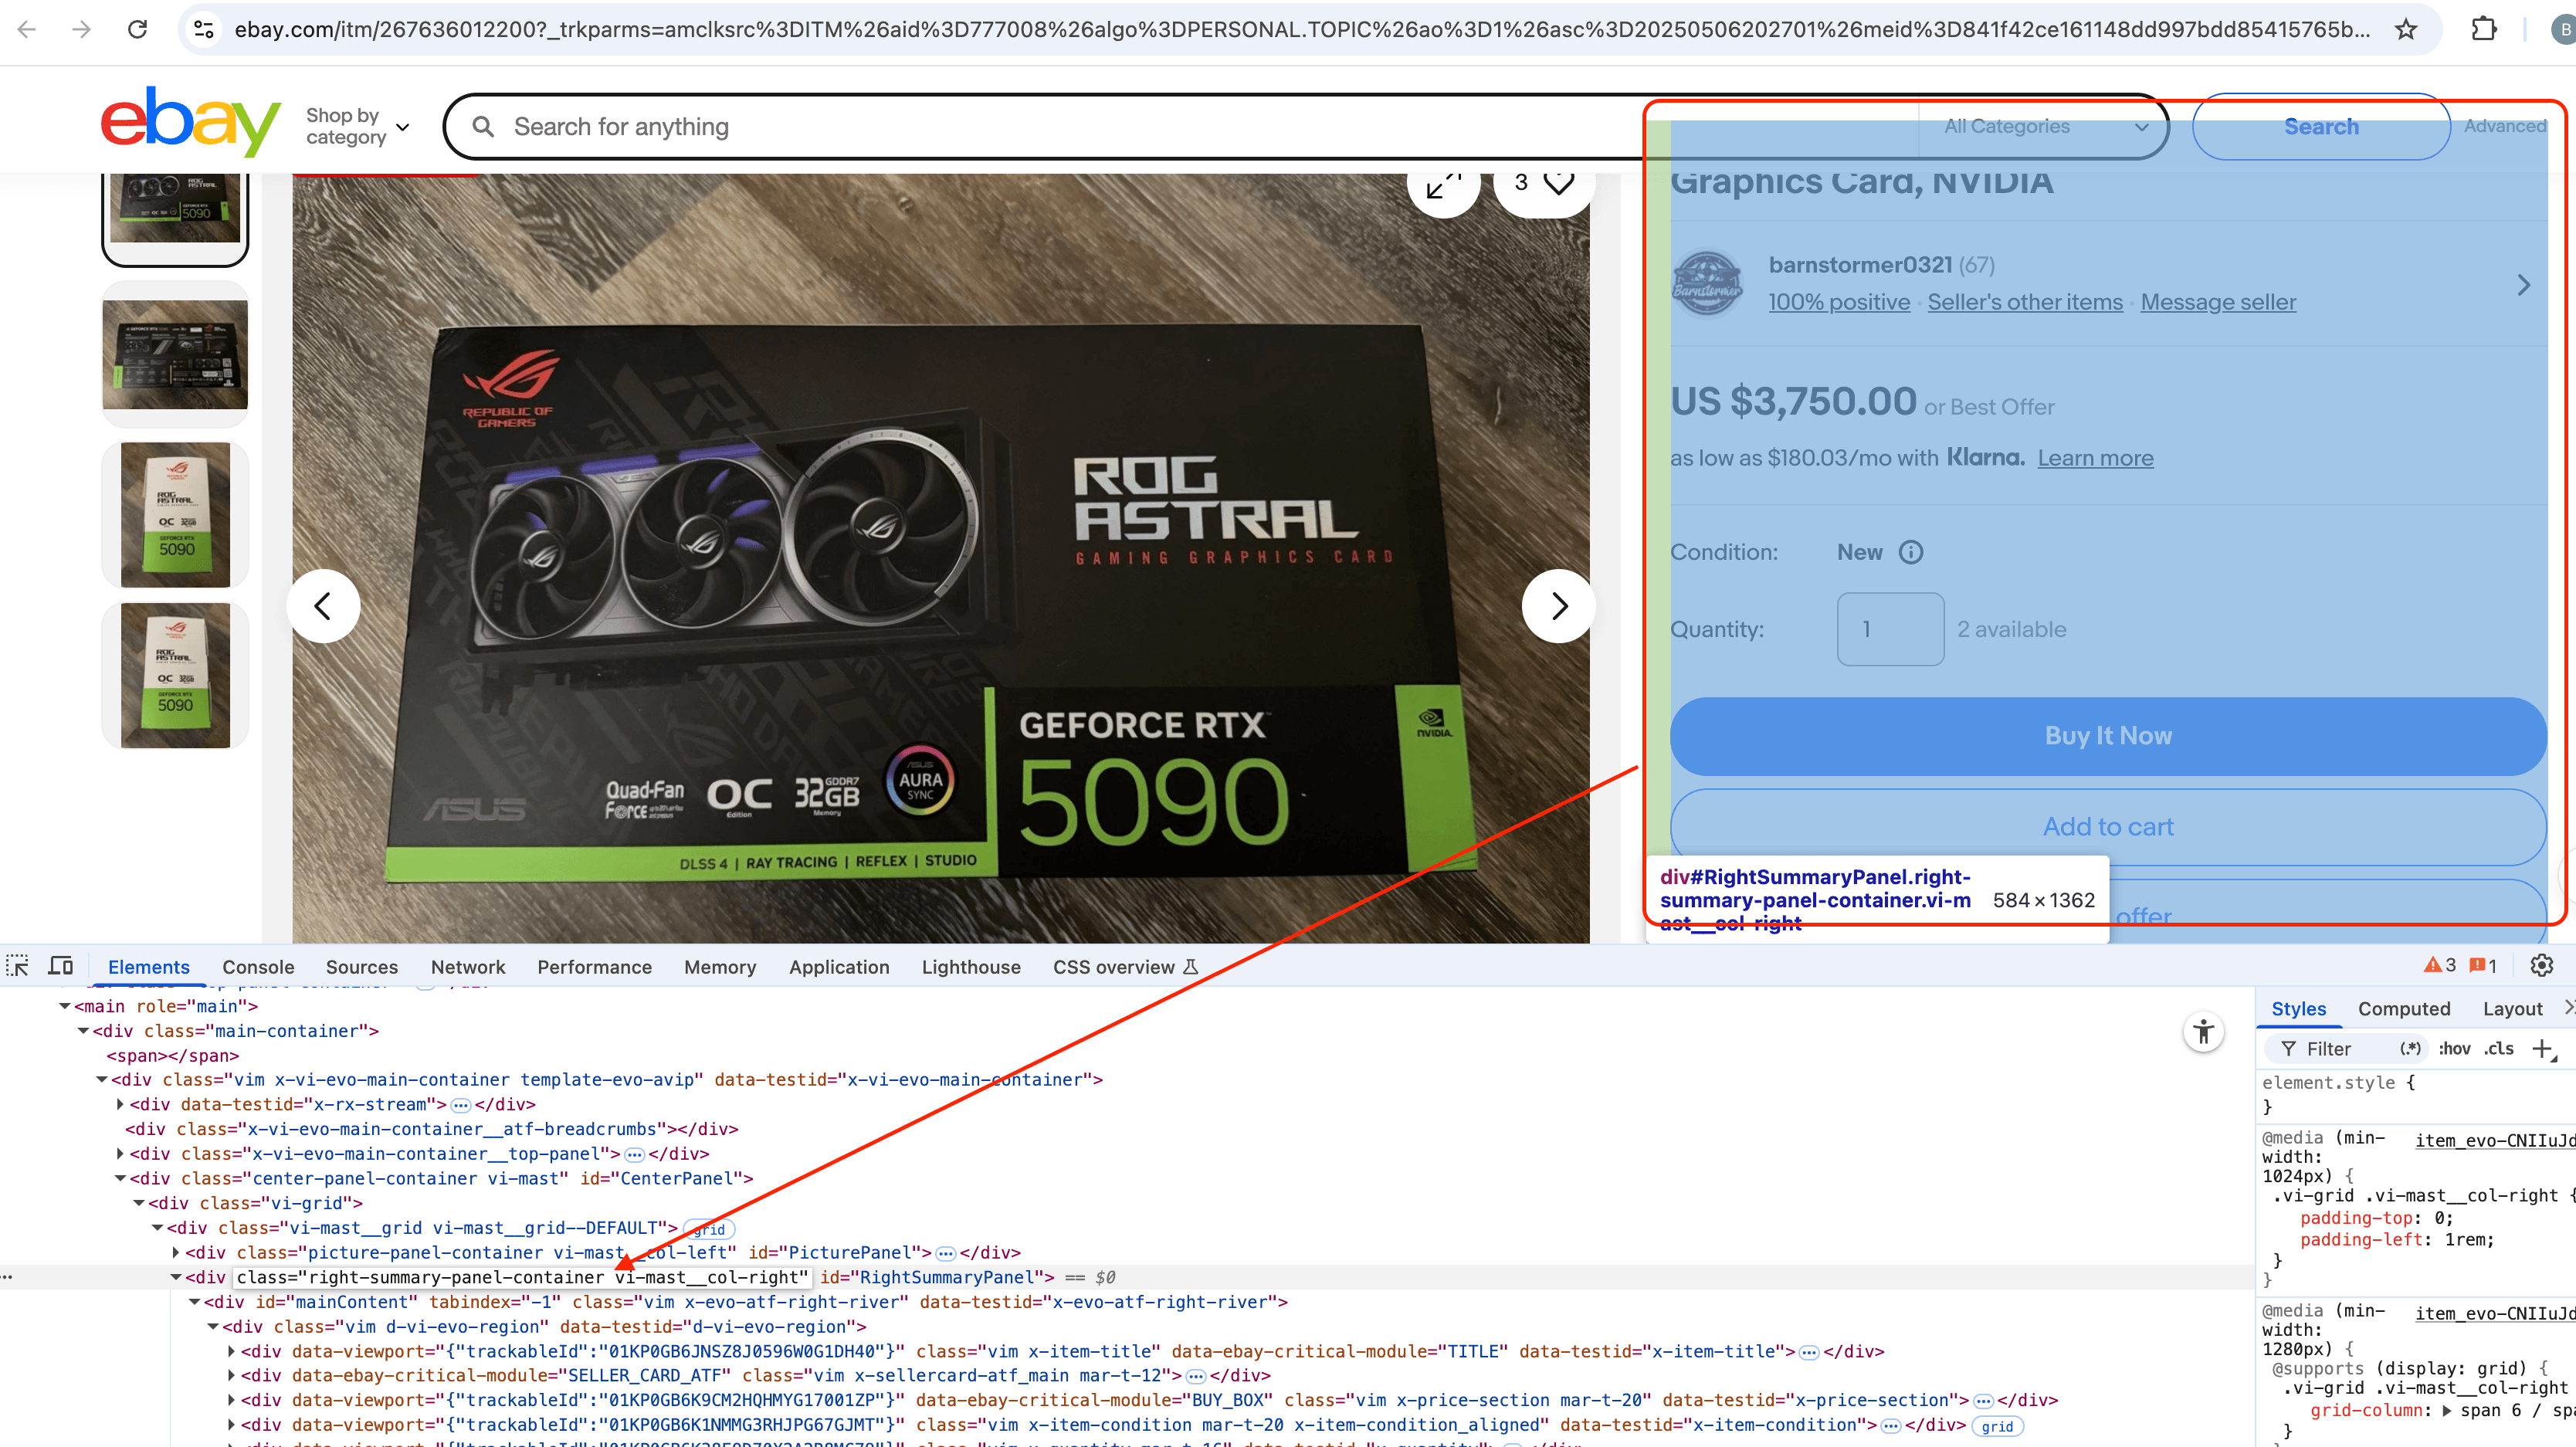
Paste that selector into the "Clip to element" field. On the next scheduled capture, the screenshot contains only the price panel — no image gallery, no eBay header, no suggested items at the bottom. If the price drops from $3,750 to $3,500, the diff highlights the change right where it happened.
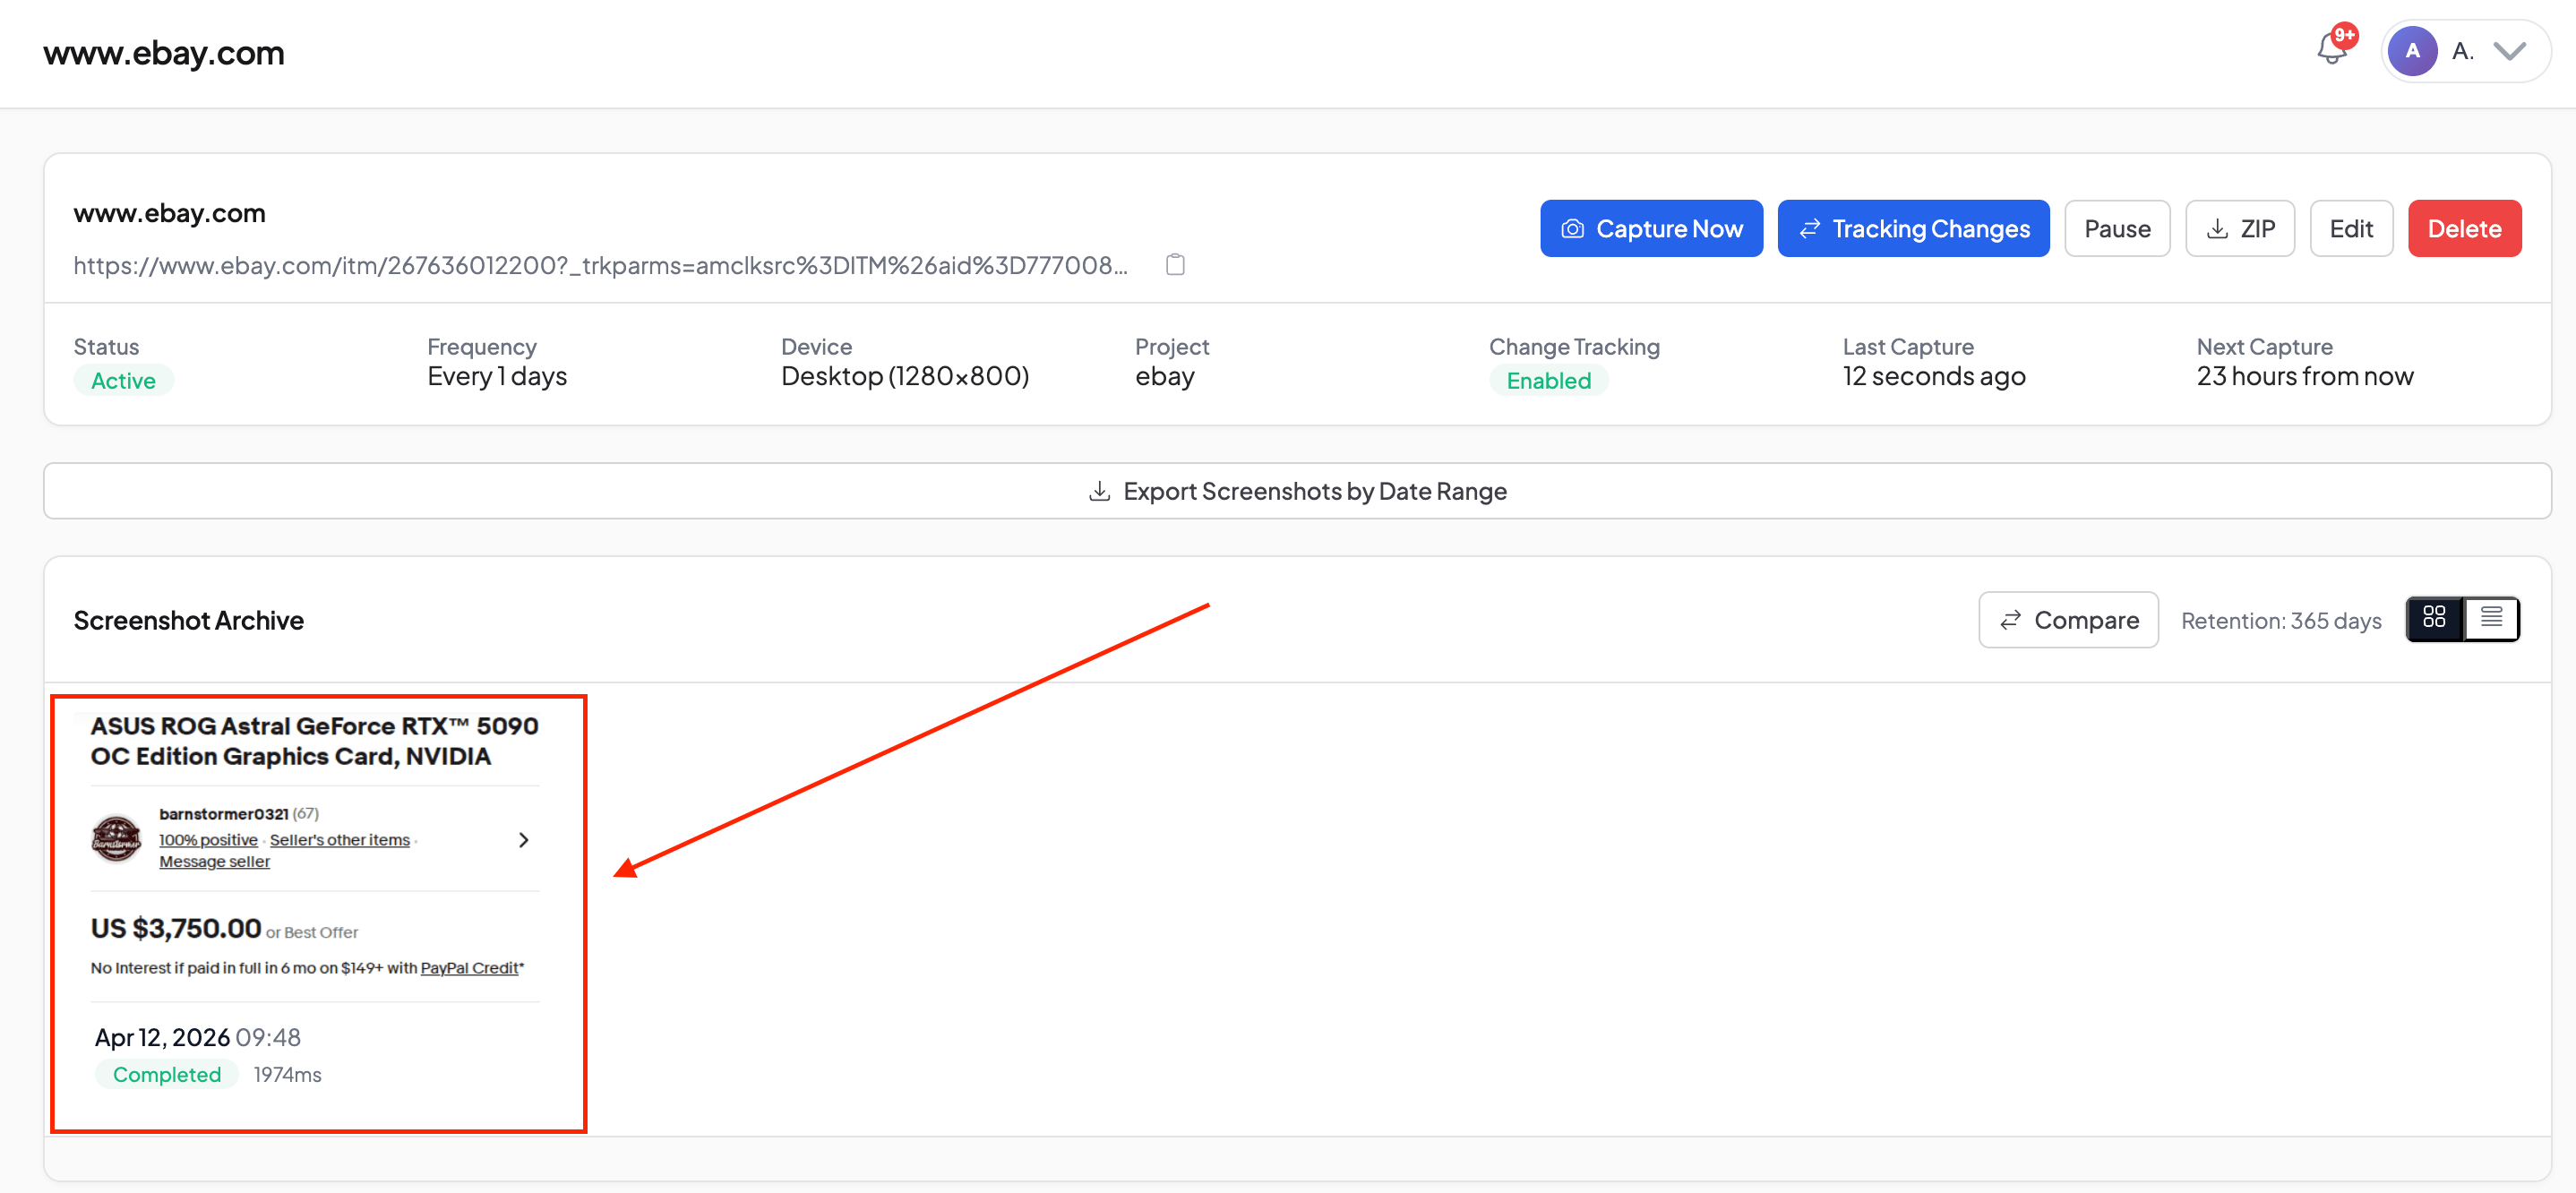
Before clipping, a typical eBay product page was triggering alerts on nearly every capture cycle. After clipping to the price panel, alert volume dropped to only captures where the actual price or availability changed. The false-positive rate drops sharply because the floating elements — recommendations, banners, ad slots — aren't in the capture zone.
One caveat worth knowing: CSS selectors can break when a site redesigns its layout. If a selector stops working after a site update, check DevTools again and update the class name in your monitor settings. It takes two minutes, but it's worth knowing upfront.
Element Clipping vs. Hide Selectors: Two Ways to Reduce False Positives
Snapshot Archive also supports hide selectors: you specify elements to remove from the page before the screenshot runs. Cookie banners, floating chat widgets, modal overlays. The full setup is covered in our guide on dismissing popups before capture.
The two approaches solve the same problem from opposite directions.
Hide selectors use subtraction — you list the things you don't want in the screenshot and they get stripped out. This works when there are a handful of known noisy elements. But on a page like Amazon or eBay, there can be a dozen dynamic blocks, and you end up adding selectors faster than new noise sources appear.
Clip to element uses selection — you name the one thing you want, and everything else disappears automatically. One selector covers all noise sources at once, including the ones you didn't anticipate.
Clip to element is the cleaner approach for most cases, but hide selectors earn their place in the toolbox. In practice, both work well together. Clip to the right element, then add a hide selector if a popup appears inside the clipped zone — a "sign in for better prices" prompt that overlays the price block, for example.
Which Pages Benefit Most from Element-Level Monitoring
Price monitoring is the most obvious fit, but the approach applies anywhere you're watching a specific piece of content inside a noisy page.
SaaS pricing tables sit inside pages with hero sections, testimonials, FAQ blocks, and live chat. Clip to the pricing grid and you get a clean diff after every capture — just the tiers, prices, and feature checkmarks. We used this in our SaaS pricing page tracking experiment.
Legal pages — Terms of Service, Privacy Policies — often have dynamic navigation and sticky headers that shift between captures. Clip to the main content wrapper and the diff shows only what changed in the legal text. This is particularly useful for terms and privacy tracking where you need a clean record of the exact clause wording.
Marketplace buy boxes and stock status indicators are another strong fit. You don't need the full product listing to know whether an item is in stock — just the buy-box element. Competitor page monitoring benefits from the same logic: clip to the hero section or the features table and skip the surrounding noise.
You can try this on the free plan with up to 3 URLs. Set it up once, and the alerts that come through will actually mean something.
Start archiving websites today
Free plan includes 3 websites with daily captures. No credit card required.
Create free account
7% of Amazon Pages Returned Errors With HTTP 200. Here's the Proof.
We added a handful of Amazon pages to track product prices. Instead of price changes, we started getting alerts about error pages. Turns out scheduled screenshots double as availability monitoring, and they catch things Pingdom never will.

7 Competitor Pages You Should Be Watching Right Now
How to set up automated competitor website monitoring with screenshots and visual diff — which pages to track, how often to capture them, and how to filter out noise from A/B tests and dynamic content.
We Ran Hetzner Through the Wayback Machine and Our Own Tool
We tested both tools on the same site for a week. The capture frequency, cookie handling, and comparison features told us more than any feature table could.